
How to Install Wheel Spacers The Right Way

Looking to give your vehicle a more aggressive stance without buying new wheels? Enter: Wheel Spacers. There's no denying that new wheels are expensive, so that's where wheel spacers come in. Wheel spacers provide a lower-cost alternative for those that are looking to give their vehicle a more aggressive stance.
Wheel spacers sit between your vehicle's hub and wheel, spacing out your vehicle's wheels. There are various types of wheel spacers, some of which are bolt on wheel spacers that have studs pressed in them and other flat wheel spacers that slide over and use the factory wheel studs. Proper installation is crucial to ensure that your new wheel spacers last and keep your vehicle on the road. Installing spacers incorrectly can be dangerous and will lead to part failure.
Things to Keep in Mind Before Installing Wheel Spacers
Here are a couple of tips to make sure that you have a good experience with wheel spacers on your vehicle.
The OEM wheel studs on your vehicle may protrude past the face of the spacer. If this is the case, take a look at your wheels and see if there are any pockets machined between the lug holes. If your wheel studs are too long and stick out past the face of the spacer and your wheels don't have any pockets, you will need to cut down your original wheel studs or replace them with shorter studs. You want to make sure that there are no gaps between the vehicle hub and spacer or the back of the wheel and the spacer.
Before you start to install your new wheel spacers, you'll want to make sure that you have purchased the correct spacers. You will want to ensure that the bolt pattern of the spacers matches the bolt pattern of your vehicle and wheels. Along with the bolt pattern, the hub size of the spacers you are installing needs to be the same as or larger than your vehicle's hub size. Finally, if you are using bolt-on wheel spacers, you will want to confirm that the thread pitch of the spacer's studs matches the factory wheel studs on your vehicle. Below are the standard and metric equivalents of the most common bolt patterns.
- 5x4.5 = 5x114.3
- 5x4.75 = 5x120
- 5x5 = 5x127
- 5x5.5 = 5x139.7
- 6x4.5 = 6x114.3
- 6x5 = 6x127
- 6x5.5 = 6x139.7
Tools You'll Need
Once you have the correct spacers, you'll want to make sure you have the correct tools on hand to complete the job. Wheel spacers should only be installed using hand tools, so you won't need to break out the impact for this one.
- Torque Wrench (Capable of up to 110ft lbs)
- Breaker bar or tire iron
- 3/4" or 19mm Socket
- Correct size socket for your vehicle's lug nuts
- Floor jack
- High quality jack stands capable of supporting your vehicle
- Wire wheel with drill or wire brush

How To Install Wheel Spacers
To start, find a flat surface where it is safe to lift your vehicle. Before lifting, be sure to break your lug nuts free, but do not completely remove them. Once your vehicle is safely lifted and supported by the correct jack stands, you are ready to begin installing your new Wheel Spacers. Be sure to work on only one axle at a time.

Remove Your Wheels
Once your vehicle is safely lifted and supported by jack stands, you can move on to completely removing your vehicle's lug nuts. Once the lug nuts are removed, carefully take the wheel off of your vehicle and set it aside.
Before Installing
Before installing your new wheel spacers, it is always a good idea to clean off your vehicle's hub and remove any corrosion. A wire wheel attached to a drill or a handheld wire brush can make quick work of this. Cleaning any corrosion off of the vehicle's hub helps the spacers slide over the hub easily and can help stop them from becoming seized to the hub. If you'd like, you can use anti-seize paste on the hub surface.
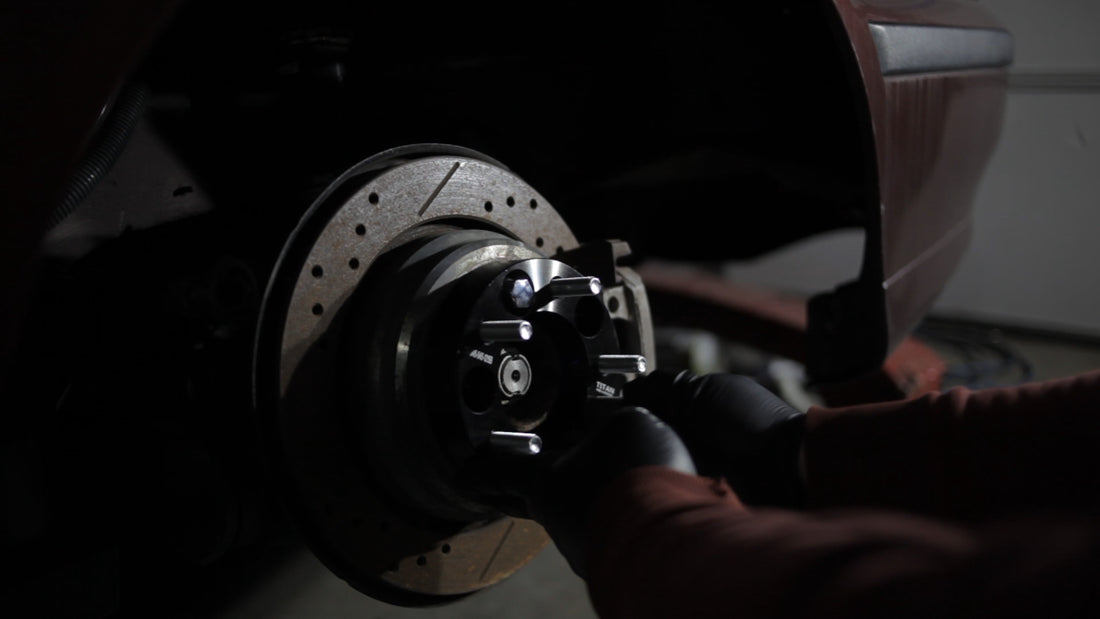
Install Your Wheel Spacers
Start by removing the open-ended lug nuts from the wheel spacer's studs. Then, slide the wheel spacers over the vehicle's studs and hub, making sure that the spacer fully seats onto the hub of the vehicle, without any gaps. Once the spacer is installed on the vehicle's hub, install the open-ended lug nuts that were included with the spacers onto your vehicle's factory studs and tighten them by hand in a star pattern.

Torque the Spacers
The lug nuts used to install bolt-on wheel spacers must be torqued to specific specifications by hand using a torque wrench. The lug nuts that are used to bolt the spacer onto the hub of your vehicle should be torqued to your vehicle manufacturer's torque specification, but the torque should not exceed 110ft lbs. If needed, find a friend to hold the vehicle's brakes to prevent the spacers from spinning while you torque them to the specifications. Be sure to follow the same star pattern you would use when installing wheels.

Quick Check:
The wheel spacers must be torqued when installed on the vehicle's hub using a torque wrench. Be sure to follow your vehicle manufacturer's torque specification and not to exceed 110ft lbs of torque.
Reinstall the Wheels
Once your Wheel Spacers are installed onto the vehicle's hub and torqued to the specifications, you can reinstall the wheels. Carefully slide your wheel onto the spacer's studs and hand tighten your original lug nuts in a star pattern. After the wheel is installed onto the spacer, you need to make sure that the wheel mounting surface seats fully onto the face of the spacer. You will need to make sure that there are no gaps between the face of the spacer and the back mounting surface of the wheel. Your factory wheel studs may protrude past the face of the spacer, causing the wheel to not fully seat on the spacer. If this is the case, your wheel studs would need to be trimmed down or replaced with shorter studs. Once the wheel is fully seated on the spacer, make sure your original lug nuts are tightened down by hand to the spacer's studs.

Quick Check:
Once your spacers and wheels are reinstalled, make sure that there are no gaps between the vehicle's hub and the back of the spacer or between the face of the spacer and the back of the wheel.
Lower your Vehicle and Torque Your Wheels
Once your new wheel spacers and wheels are installed, it is time to lower your vehicle back to the ground. After your vehicle is on the ground, torque your lug nuts in a star pattern by hand, using a torque wrench. The lug nuts that attach the wheel to the spacer should also be torqued following your vehicle manufacturer's torque specification, but they should not be torqued over 110ft lbs.

Finishing Up
After you have installed all of your new spacers and everything is torqued correctly, take your vehicle for a quick test drive to make sure that you don't have any new vibrations. If you experience any issues, double-check that your spacers and wheels are fully seated with no gaps between any of the parts, the wheels and spacers are centered properly, and that all of the lug nuts are torqued to the correct specifications.
Post-Install
We hope you are enjoying your new wheel spacers! One of the most important steps is to re-check the torque on your wheel spacers after driving your vehicle 25 miles. You will need to remove the wheels to double-check the torque on the lug nuts that bolt the spacer onto the vehicle's hub. It's always a good idea to check the torque on your spacers and wheels every so often after the first 25 mile check-up.
